Just another WordPress.com site

Latest

Butter Chicken Recipe

This delicious recipe is from a Facebook group that I am in. It’s simple, rich, and tastes like a fancy restaurant dish. Use cut up pieces of chicken, or even fish. I’m thinking of trying it with turkey breast chunks for a non-conventional Thanksgiving this year.

BUTTER CHICKEN Recipe

Betty Gandy-Tobin
I can’t remember who I promised this butter chicken recipe to…so I’m posting it to all my cooking groups. It is delicious and easy to make.

Butter Chicken

1 kg chicken

Salt and Pepper to taste

1 ½ t chili pepper

2 t each ginger and garlic powder

2 T tandoori spice

1 c laban (I use yogurt)

1 cup grated tomato
, or chopped

Fresh cream (I used one can of ghushta)

1 t gharam masala

Butter

Mix chicken, salt, pepper, ginger, garlic, tandoori spice, chili powder together and cook in butter. When almost done, add tomatoes and cook for 10 minutes. Add laban and cream. Mix well. Add gharam masala last. Garnish with fresh coriander.

Tandoori spice recipe

3 T garlic salt

2 T cayenne pepper

2 T coriander

2 T cumin

2 T ginger
1

½ t cardamom

1 ½ t cinnamon

Mix well in a blender.

Enjoy!

Katy

Amazing Recipe: Spiced Squash with Yogurt Dressing

Just tried this new recipe the other night, and my husband and I ate the whole thing in one sitting it was so good!! It’s unique, beautiful, gourmet delicious yet simple to make. I used a 2 lb (0.9 kg) or so butternut squash. (Spices are just perfect the way they are. I added a bit too much cayenne and it interfered with the flavor a bit.)

This could be a great, unique dish for Thanksgiving. It comes from www.abundantharvestorganics.com, where we get a weekly box of fresh,local, organic produce. If you’re in the Los Angeles area, check them out. They deliver from San Luis Obispo County down to the Inland Empire. If you’re not in Southern California, you can enjoy the recipes on the web site.

Spiced Squash with Yogurt Dressing

Preheat Oven to 425˚

1 winter squash (butternut, acorn) peeled and seeded, cut into 1 in. thick pieces
2 tbsp olive oil
½ tsp allspice
Pinch of cayenne pepper
Salt and ground pepper
¼ cup plain yogurt
1 tbsp lime juice
¼ cup chopped basil
¼ cup pomegranate seeds

Toss the squash, 1 tbsp olive oil, and spices in a shallow baking dish. Roast until tender, for about 15-20 minutes, stirring just once. [I cooked for 30 mins.] Let cool slightly. Whisk the yogurt, lime juice, 1 tbsp water, the remaining olive oil, and pinch of salt in a bowl. Transfer the squash to a serving dish and drizzle with the yogurt dressing. Sprinkle with the pomegranate seeds and basil.

I tried making the yogurt dressing by itself

This is an exceptional dish.

and putting it on salad. I added more olive oil and salt and pepper and would omit the water next time. It would be very refreshing in the summer I bet.

– Katy DeBra

EFT and Energy Tapping, Part 2

In Part 1 of the post, I rounded up my favorite EFT web sites and gave a general description of EFT, emotional freedom technique. In this post I would like to speak about the uses for general energy tapping on the body that I have experienced.

The energy healer Carol Tuttle recommends tapping ourselves all over our body–just quickly and lightly tapping up and down our arms and legs, over our torso and head and face–at the end of any type of healing session or after learning new material or making a declaration to ourselves, after different types of internal shifts and changes. This stimulates our nervous system to notice and assist with integrating the new information, feelings or attitude we have. It also helps us be completely present in our bodies at that moment to maximize the integration process.

http://www.caroltuttle.com/aboutenergy.asp


Energy medicine pioneers Donna Eden and David Feinstein have also taught specific methods of tapping. For example, if you have an area in physical pain, say a cut, you can lightly tap all around the area about 1 – 2 inches away from it to stimulate the nervous system away from where it’s focused, the painful area. The tapping draws the nerves attention away from the painful area, lessening the pain. I have tried this myself with success.

In addition to their own version of EFT, there’s a wealth of information about many other energy medicine methods they have developed over many years. I enjoy getting their newsletter to keep up on their latest activities and discoveries.

 http://www.innersource.net/innersource/


I’m sure there are more ways to use general tapping out there!  I wanted to make the distinction between the two types of tapping because people have told me they sometimes forget the EFT points when they are learning them and just tap all over instead. General tapping is still beneficial, but it orients more towards the nervous system while EFT tapping taps into multiple systems in the body at once.

Have fun tapping!

– Katy DeBra

EFT and Energy Tapping, Part 1

EFT stands for Emotional Freedom Technique. The most concise description I know of is emotional acupressure. It is based on tapping the meridian endpoints (used in acupuncture and acupressure) with one’s fingertips.

It falls into the general category of Energy Medicine, an emerging field. There’s already lots of research to back up the results, for those who are into that.

I have used this technique for over ten years with great success on everything imaginable. I have used it twice to cure a UTI overnight. I have used it for pain relief, when I can’t sleep, when I’m upset, scared, to dump old emotional baggage. I have used it to help my pets–to ease their pain, to end overeating leading to being overweight. People ask me about it frequently and how to learn it, so i created this post.

Developed originally by Gary Craig, who created and maintained http://www.emofree.com for many years and created the first certification program, many other gifted healers have taken it up and expanded upon his foundation.

Here are my favorite web sites to learn and practice EFT and other types of tapping.  They are all loaded with resources. Many of them send out informative newsletters.

http://www.thetappingsolution.com/how-to-tap.php

Nick and Jessica Ortner have made a documentary with the same title. They offer a free video which shows the basic tapping points and how to do, as well as videos and audios to tap along with if you’re not sure what words you’d like to use. They also offer a monthly club membership site.

http://www.eftdownunder.com/

Steve Wells and David Lake, down under in Australia, started with EFT tapping and developed their own simpler version of tapping on the fingertips only, called SET tapping. They have done numerous studies and offer workshops all over the world. The most important thing I think they have discovered is that it doesn’t matter what points you remember or using them in order, etc. Any tapping on the meridian endpoints offers benefits. They wrote a book for kids to learn to tap also.

www.caroltuttle.com (http://www.caroltuttle.com/aboutenergy.asp)

Carol Tuttle is another pioneer in this field. She offers among many things a membership site that you can try for 3 days for $3.95 with videos you can tap along to. Her genius is in knowing what words and expressions bring the most healing quickly. She’s one of the most gifted people out there in this respect. I also like her Energy Profiling system. It has also brought me peace and understanding.

http://www.attractingabundance.com/

Again, Carol Look is a pioneer and leader in this field. I’ve seen videos of her tapping with people who been in physical pain for decades and get some relief for the first time with tapping. She offers numerous products and classes.

http://www.bradyates.net/

Brad Yates has many youtube videos posted–just click the button in the top right corner of his web site home page. He’s very funny (I call him the Stephen Colbert of tapping) and an excellent healer. You can tap along with his videos. He also has a book for kids to learn how to tap.

• http://www.mygenie.tv/

I love the energy of David Childerley–and also good if you enjoy a British accent! My favorite video of his is this one about money. Great statements to use no matter where you stand financially:

http://www.youtube.com/watch?v=YdZOpbb7HzA

After so many years of tapping these are my favorites, but there are many gifted practitioners out there who can get you started. Most important is to go with who you are drawn to, with whom you most resonate.

If you find the basic tapping points around the face and upper body too weird or silly or want points to use casually in public, then try the fingertip points using the SET method at eftdownunder, and “karate chop point” along the outside of the hand. There are also points about halfway down on the outer side of each thigh. You can tap these while you walk or during a meeting.

You can also try lightly pressing the tapping points and taking a deep breath at each one if you don’t want to or can’t tap. I’ve even read about people who have visualized tapping on themselves and gotten the results they wanted.

An important tip: when you can, speak the tapping phrases out loud as you tap. This usually brings about a quicker result, especially in areas that we feel really stuck. If you are dealing with an emotional topic, express that emotion as you speak. If you are releasing a traumatic incident, play the movie of it in your head and stop to tap on each part of it that bothers you.

Some people, like myself, have had great success learning and doing it on their own, and others prefer to work with someone or purchase an audio or DVD to follow along. Whatever you do, try some tapping. In the words of the Ortners, “try it on everything.”

– Katy DeBra


Just in Time for Thanksgiving: New Green Bean Casserole Recipe

We’ve had a lot of green beans this year in our produce box, and we were looking for a different way to prepare them. Good old green bean casserole came to mind, yet the thought of using Campbell’s Cream of Mushroom canned soup was intolerable. So I looked up the Cream of Mushroom soup recipe in The Fannie Farmer Cookbook, and it’s really simple to make. Homemade soup is the ticket here. Make extra to eat by itself or with cardboard! ;0)

We added some other veggies and cooked quinoa. This is so delicious!! It satisfies as a side dish or the main course. You could almost serve this instead of stuffing at Thanksgiving. It’s worth the extra steps, and can be prepared ahead.

New Green Bean Casserole

This makes enough to fill a 13″ x 9″ casserole dish. Amounts of vegetables are approximate.

4 – 5 cups chopped fresh green beans

1 cups sliced mushrooms (crimini)

2 cups diced roasted butternut squash

1 crown broccoli chopped (about 4 – 5″ diameter)

2 cups cooked quinoa

4 – 5 cups cream of mushroom soup (recipe below)

Optional: ½ can of Trader Joe’s Fried Onion Pieces to sprinkle on top

Preheat oven to 425˚. Start preparing the cream of mushroom soup.  As onions and mushrooms saute, peel and dice the butternut squash, toss with some olive oil, salt and pepper, and put into oven to roast. Roast for approximately 25 – 30 mins, turning once. When done turn heat down to 350˚.

Chop the green beans up into small pieces about 1″ or 2.5 cm long, and saute in olive oil on the stove just until they start to get tender, but still very crunchy, about 5 minutes.

Place the sauteed green beans in the casserole dish with the rest of the vegetables and the quinoa. Mix in the cream of mushroom soup until all is well-coated and you see a bit of soup along the edges of the pan. Sprinkle with half a can of Trader Joe’s Fried Onion Pieces. Bake in 350˚ oven for about 20 minutes.

Cream of Mushroom Soup 

from The Fannie Farmer Cookbook by Marion Cunningham

[makes 3 cups]

NOTE: Make a double recipe to have enough for casserole and a bowl or so leftover.

4 tablespoons butter

¼ cup finely chopped onion

½ pound mushrooms, chopped fine (I used crimini)

1 tablespoon flour

2 cups chicken broth

½ cup cream

Salt

Freshly ground pepper

Optional: 2 tablespoons corn starch

Melt the butter in a pot and add the onion and mushrooms. Cook over low heat for 15 minutes, stirring occasionally. Sprinkle with the flour and cook for a few minutes more. Slowly add the stock, and heat, stirring, until it reaches the boiling point.

**For extra thickness for the casserole recipe, I also added 2 tablespoons of corn starch dissolved in ¼ cup cold water after I finished adding the broth and let it boil for 1 minute before turning heat down.

Reduce heat and simmer for 20 minutes. Stir in the cream, add salt and pepper to taste, and reheat before serving.

Vegetable broth instead of chicken broth is also delicious. To make it vegan, I would double the cornstarch and add a cup of soy milk.

–Katy DeBra, ©2011 (except for Fannie Farmer soup recipe.)

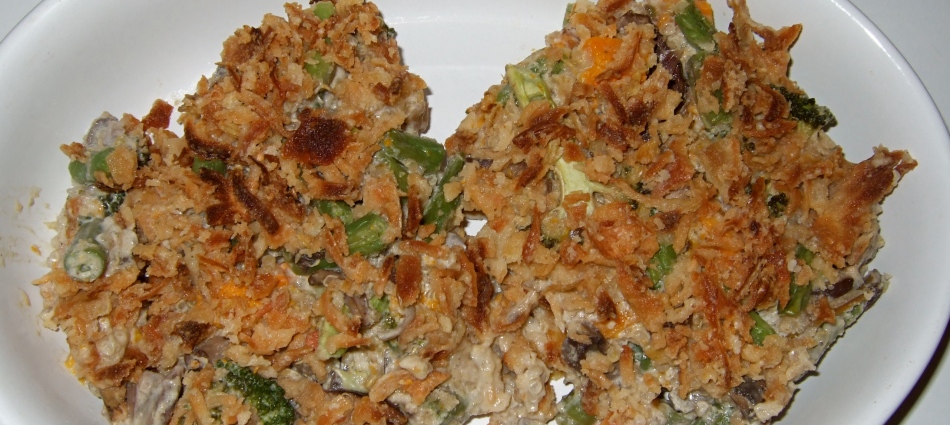
Here's a view of what's left, cut into two pieces. (Lucky I remembered to take a picture before it's all gone!)

How to Swatch Paint Color Selections

Here is a step-by-step process to assure that you truly see the colors you swatch and whether you like them in the room. Without a proper swatch, you might select a paint color you don’t like and have to repaint a room more than once.

1. Size of paint swatches: minimum size to truly see the color is 2’ x 2’, up to 4’ or 8’ wide depending on the location.

2. Location of paint swatches: generally you will want to swatch in multiple locations to see the color in different lights. You will want to see it at the ceiling line where it will be darkest as well as in the middle of the wall where it will be lightest. At the ceiling line, paint all the way to the ceiling—don’t leave a tiny strip of the existing color.

3. Wrap it around a corner: you also need to see the color reflecting on itself to see how it will look in a room. This will show you the color intensity once the paint color is throughout the room. For example, some colors have a high “glow factor”, bright pastels for example. A light blue, pink, purple, yellow, orange, or green, can really get intense once it’s reflecting on itself throughout the room. Some paint decks, such as Benjamin Moore, give a light reflection index number for each color to give you some idea of this.

4. Overlap the color swatches: if swatching multiple colors, put them next to each other and overlap the edges. Or, if you need to see each color by itself, then leave at least a foot a space between them.

5. Alternate options to painting on the wall: paint 2 large pieces of foamcore, cardboard, mat board, or wood panels, at least 2’ x 2’. Then you can put them together in a corner at various heights to see the color.

6. How to look at swatches: you want a large swatch so you can block out the surrounding colors when you look at it. It’s very important to look at the center of the swatch and avoid the edges. Colors change according to what other colors they’re next to, and sometimes the edges can look odd or have a colored edge. It can be helpful to look through your hands or through a square cut in a piece of paper or cardboard (preferably a gray or tan color) to block out the surrounding colors. Squinting can also be helpful to get a good sense of it. Remember to check the swatches at several times of day. If you will use a room primarily at night, be sure to check them then.

7. Other things to know about swatches: a swatch generally looks about a half shade darker than it will once an entire wall is painted. If you’re having trouble deciding between two colors, it might be a good idea to paint an entire wall, or half of a wall, in each color, going all the way to the edges.

8. If you’re using an intense color, remember that you will be seeing it with furniture and other things in the room. Don’t let the intensity of a wall full of color all by itself scare you!

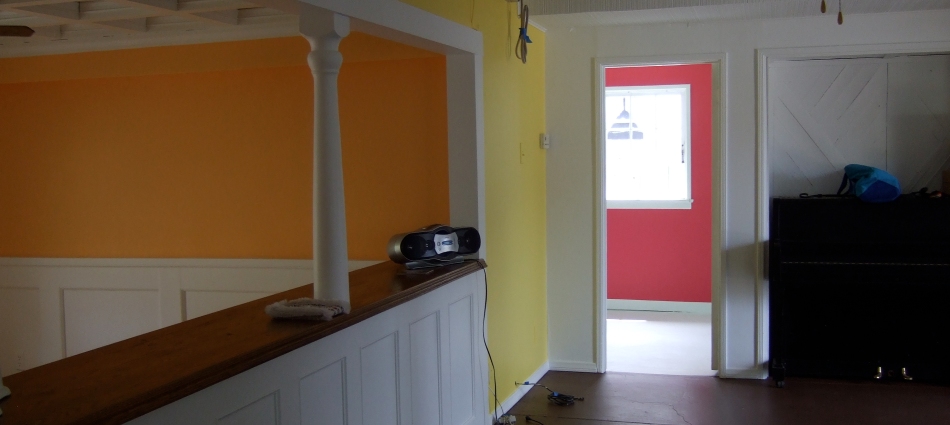
9. If you’re under construction, and looking at swatches against primer or concrete sub-floor, remember that this makes it more difficult to really see a color as it will be. This is where a large swatch really helps. If you have a sample of your floor color and material, look against that, or place a painting drop cloth on the floor or even a piece of plywood. The grayness and texture of a concrete sub-floor can really pull the life out of a color, or make a very warm colors like golds, yellows, oranges and some browns, look just plain bad!

10. Circumstances and relationships in color are everything!

11. Printed or paper swatches are okay for initial selections, but make sure to use the actual paint for your color finalists for optimal accuracy and to see the color on your wall texture in your lighting.

Here’s to creating your vision!

These are only a few of the considerations to select a paint color you like.  To avoid costly mistakes or to schedule a color consultation with Kathryn, contact me by commenting below or by email at contact@artbykd.com, or through my web site, http://www.artbykd.com.

How to Select a Paint Finish

Here is a step-by-step process to determine the best paint finish for your project. With new technology and paint formulations, there is a wide selection of finishes to choose.

1. Paint finishes available: flat, washable flat or matte, flat enamel, eggshell, low sheen or satin (or Pearl in Benjamin Moore), semi gloss, high gloss. Each paint company may have their own names for the finishes and small variations in sheen.

2. Determine the traffic flow and needs of the room: will the walls need to washed? If so how often and how much, how firmly?  And, determine your personal preference. These are the two biggest considerations.

3. With new technology, any finish can be washable. The days of flat paint not being washable are long gone. Surfaces don’t need to be in semi-gloss paint to be washed anymore, or to withstand steam or moist rooms, like kitchens and bathrooms. The quality of the paint will affect how washable it is as well. It may still be difficult to wash a very low quality flat paint, while a high quality paint is usually washable in all formulations.

4. Consider your wall texture: sheen in a paint finish will tend to accent wall texture and irregularities. If you have orange peel knockdown texture, which is most common in newer construction, flat or eggshell is best for minimizing that. If you have hand-plastered walls, a flat or eggshell finish will look more authentic and old world. If you have totally smooth walls, the choice is yours.

5. Consider light bounce: sheen will bounce more light around a room. If a room is quite shadowed or has northern light, and you’re using a lighter color, an eggshell or satin finish might brighten up the room more than a flat or matte finish. Personal preference comes in here again: how much light do you like in a room?  Do you prefer as bright as possible? Or perhaps no sheen might create more serenity for you?  My sister, for example, craves light and prefers semi gloss paint down her dark hallway. In her more light-filled living room and dining room/kitchen, eggshell finish accents enough light for her, while minimizing the wall texture.

6. Consider the color you are using and the mood you want to create: with dark colors, usually a matte/flat finish looks best. There are cases where a shiny dark finish can create high drama. A matte finish, or low sheen finish can accent an antique or old world look, or help create a cozy atmosphere.

7. Trim and cabinets: again, all trim being semi-gloss is an outdated concept. It’s mostly personal preference. Semi or high gloss can accent beautiful woodwork and trim. If trim is irregular or in bad shape, an eggshell or satin finish will help diminish imperfections. In smaller rooms, lower contrast can help it feel bigger and smoother. A closer match in finish between walls and trim might be the better choice.

8. Create consistency and harmony by using the same finishes for walls, ceiling and trim throughout the home or office, or in different sections as it makes sense. If the same finishes don’t work through the entire space, then make a rule for different sections, such as one for the bedrooms and one for the living areas.

9. Remember, with today’s technology, there are no limits to the finish you select. It’s a matter of what you prefer and what looks best to you in your space.

Here’s to creating your vision!

These are only a few of the considerations to select a paint finish you like. Paint finish is closely tied to the color used. To avoid costly mistakes or to schedule a color consultation with Kathryn, please contact me by commenting below, by email at contact@artbykd.com, or through my web site, www.artbykd.com.

–KD

How to Make Small Rooms Feel Bigger

The central key to make small rooms feel bigger is to unify the tone, not necessarily make it white or light colored. I have found this to be one of the only “rules” in interior design.

Tips to unify the tone:

• follow the natural lighting of the room to decide on light, medium or dark tones, e.g. a brightly lit room will feel bigger in lighter, brighter tones and a more dim room will feel bigger in medium to dark tones.

• avoid high contrasts in all elements, especially colors. If you use white trim with darker colored walls, choose an off-white instead of bright white. If walls are a medium or dark tone, it may look better to paint the ceiling a light or medium color instead of leaving it white. Same goes for very warm or cool colors.

• if there is lots of moulding and trim from windows, doors, and shelving, paint walls and trim the same color to cut down on contrast.

• if there is a window with a good view, draw the eye out, towards the view, by continuing a color or element from it inside the room. If there are trees out the window, for example, hang artwork with trees in it near the window, or use tree or leaf motif throw pillows on a couch.

• a light blue or sky mural ceiling may enlarge a room, especially one with a low ceiling.

• use fewer, larger pieces of furniture and decorating elements, rather than lots of small things. Group small pictures or decorative elements together on the wall, with unifying frames and/or colors to create a larger element.

• stick to furniture with similar styles or shapes and minimize the number of different finishes in the room, especially if they contrast highly. If each element has a different finish, consider refinishing or reupholstering all to match one piece.

• clean up visual clutter.

• if you have open bookshelves, group books together by size where possible. Or cover them with doors or fabric, use magazine holders for uneven items and loose papers, and photo or other decorative boxes for small loose items.

–KD

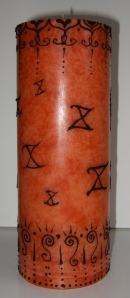
*Tenth Anniversary Henna Candle

For my first henna candle, I made a Tenth Anniversary gift for some friends. They really loved it! The three roses represent their family: the parents and their child.

I found it a bit trickier to apply the henna to the wax and handle the “art in the round” than applying it to wooden shapes and canvases. The henna paste takes longer to set up on the wax as well. Overall it’s pretty delicate and best to pick up or hold the candle on the wax areas and not touch the henna. Also, there’s no protective topcoat to help stick on the henna paste.

My friends want to keep it for the artwork and not burn it. I encouraged them to go ahead and burn it eventually. It’s a candle after all, functional art. Then they realized they still have a candle from when they were married (it’s sculptural, of two figures together.) So they decided to burn that one first, and burn this one by their 20th Anniversary. I wish them many candlelit evenings!

Please contact me to commission custom henna candles and other artwork.